Archive | The Organized Party Planner RSS feed for this section

Tips for Making Neon Pasta.. or Why You Should Make Neon Pasta

Neon Pasta

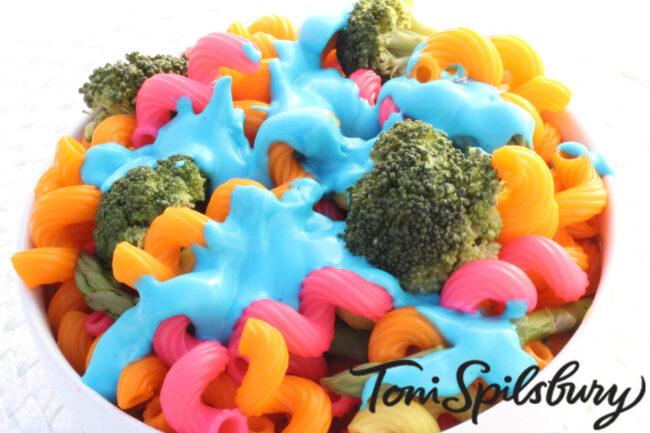
I first posted these photos in 2012 as a fun tribute to the opening of Disney’s the Lorax. This answers the question of why I originally wanted to make neon pasta. Yes, the broccoli was meant to represent the trees from the movie and the blue alfredo sauce- the river.  But after my neon pasta photo was listed as a Pinterest favorite photo of the day and has been shared thousands of times, I figured that maybe more than Lorax fans would want to cook up some neon pasta of their own.  Here’s my tips to making your pasta pop (we’ll answer the “why” later):

The Lorax Pasta

Toni’s Tips for Making Neon Pasta

Tip #1:  Choose A Fun Shape

Bowtie, penne, elbow, or my favorite- cavatappi pasta…. the purpose behind making neon pasta should undoubtedly determine its shape. Having a rainbow-themed party? Elbow. Want to bring the 80’s to dinner? Linguine.  And, for a formal affair, use bowtie, of course.

Tip #2:  Use Premium Food Dye

You can use an entire bottle of a cheap grocery store food dye and it still won’t give you the bright colors a professional food dye can (can you say “Pinterest fail”?). My favorite dyes are Wilton and Duff, which can both be found in Michaels or Walmart. In fact, Duff has a special line of neon colors like “Electric Pink” and “Electric Purple”.

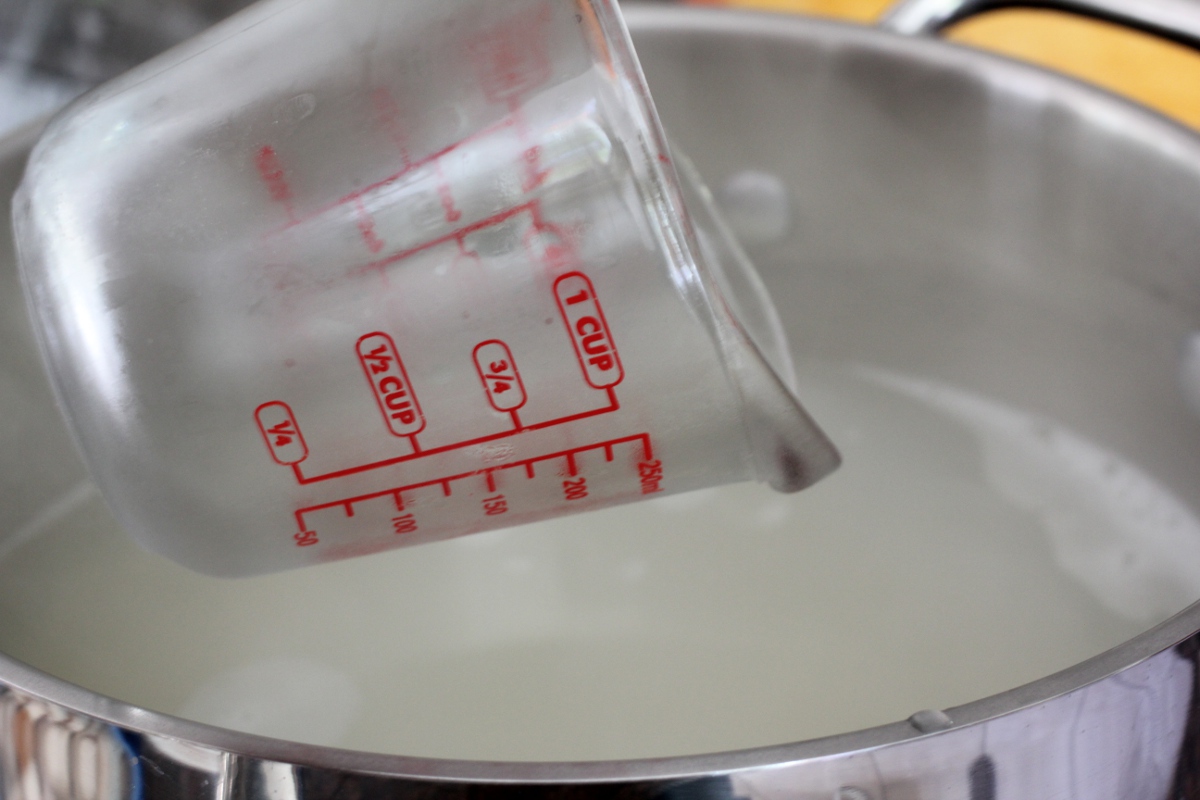
Tip 3:  Don’t Toss Your Gold (your pasta water, that is)

If you follow any of my tips, you’ll want to follow this one. I call my pasta water liquid gold because I save it to the side for when my pasta gets dry and dehydrated, I simply splash some pasta water over the pasta to get it shiny again.  Take a glass measuring cup and scoop out the water before draining the pasta, one cup for every half pound of pasta.

scoop out pasta water

Tip #4:  Don’t Mix Your Water

Yes, you will have to boil each color individually (I know, duh). I start with my lightest color first and work my way up to the darkest colors. This makes saving your pasta water to rehydrate the pasta even more critical. The alternative is to get out three or four pots and boil them at the same time in separate pots, but personally, I only like to wash one pot.


Why You Want to Make Neon Pasta (come on, you know you want to)

I know you’re probably searching your brain for a reason to make neon pasta by now, right? The truth is that it’s just a fun touch to a party. Here are my reasons:

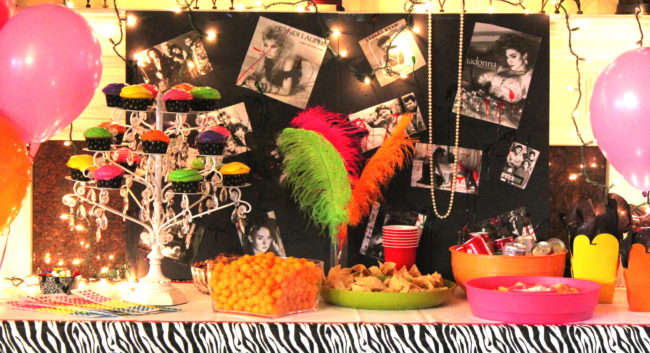
Reason #1:  80’s Themed Party

A few years ago I threw an 80’s themed party for my niece and thought a nice addition to some pizza would be a big bowl of neon spaghetti with their choice of marinara or alfredo sauce to top. It turned out to be one of the biggest hits of the party when I only thought it would be just a nice added touch. The girls talked about it all night.  You can read more about it here:

80s party

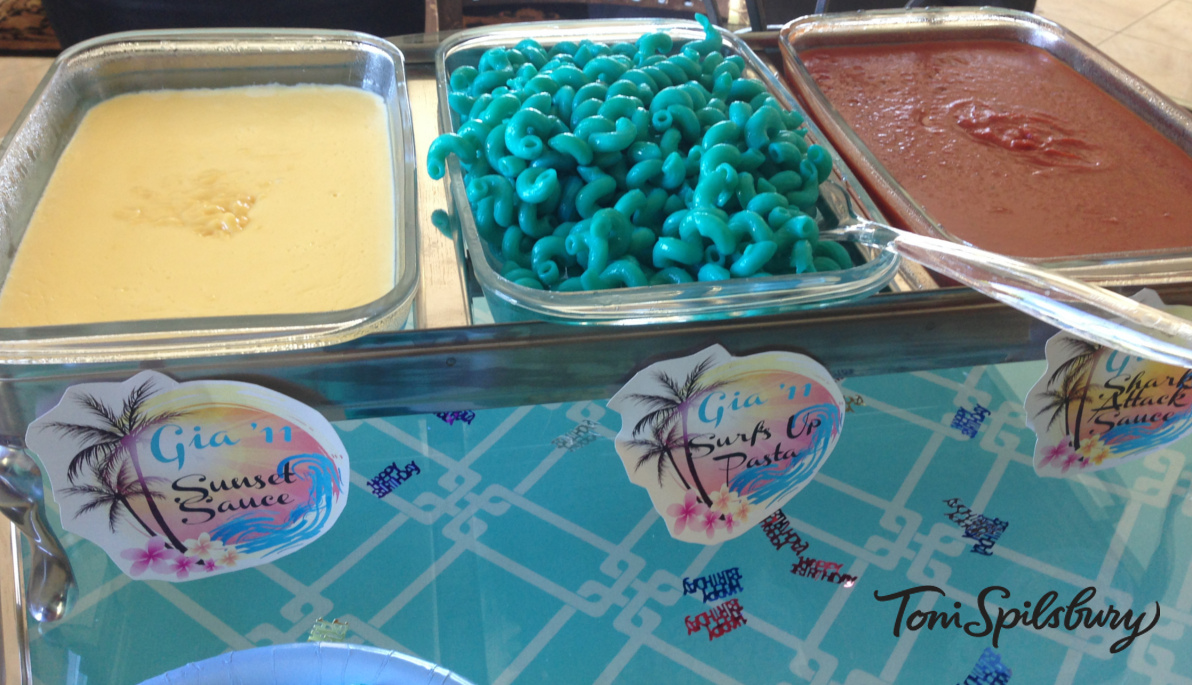
Reason #2:  Beach Themed Party

Okay, I might have gone a bit too far with this one. A friend was having beach-themed party for her daughter and needed some help so I made some “Surf’s Up Pasta” (blue cavatappi pasta for the waves) with a choice of Shark Attack Sauce (marinara) or “Sunset Sauce” (alfredo).  Yep.  Big hit.

Surfs Up Pasta


Reason 3#:  Because It’s Fun

Do you really need a reason to make neon pasta?  If you do, please refer to reasons 2 & 3 above.

Share Your Neon Pasta Photo #OrganizedCook

If you decide that neon pasta should be served at your next party and decide to take a photo, please tag me at @OrganizedCook on Instagram or Twitter, or post a photo to my Facebook.  Would love to share it with the rest of our readers!


Email this to a Friend Email this to a Friend
Comments { 0 }

A Fairy Garden Birthday Party

How To Throw A Fairy Garden Birthday Party

It’s Springtime… the perfect time for a garden party.  Or, more specifically- a Fairy Garden Birthday Party.

fairy garden party

How To Throw A Fairy Garden Birthday Party

Ingredients For A Fairy Garden Birthday Party:

  1. Fairy-Berry Lemonade Punch
  2. Garden Cupcakes
  3. Fairy Talent Games
  4. Gardening Fun
  5. Party Printables

party printables from the TomKat Studio


These party printables came from the TomKat Studio including invitations and adorable party circles that I used for a variety of decorations.  I also love party printable designs from BellaGrey Designs.


3 Party Activities for Fairy Garden Birthday Party

Activity #1: Which Fairy Talent Are You?

fairy garden birthday party

Which Fairy Talent Are You?

Using the theme of Disney’s Pixie Hollow Fairies, I cut out emblems for each fairy talent: water, garden, light, animal and- of course- tinker talent.  I attached each emblem to a paper bag containing an item related to that talent:

Water Talent: glitter water balls from Michael’s

Garden Talent: flower seed packets and small terracotta vase

Light Talent:  mini kaleidoscopes

Animal Talent: small resin animals

Tinker Talent: toy tools

I hid the bags around the yard and had the kids hunt for them.  Whichever bag they found, decided their fairy talent, similar to how Tinkerbell found her talent in the Disney movie:

Activity #2: Face Painting

If you’re fortunate enough to have an artist in the family to perform slave labor for you, like my oldest daughter, Rayana, a talented and creative individual who loves is forced to help out with my projects, face painting is the perfect activity for a Garden Fairy Birthday Party.

Most of our young fairy guests wanted  face paintings like butterflies, bunnies or flowers.


Activity #3: Take A Garden Home

Everyone gets to be a garden fairy today.  A flat of flowers from the nursery, a bag of potting soil and individual vases creates a lot of garden fun.  Each fairy guest got to pot their own flower to take home.

fairy garden birthday party

flower potting


I found these adorable individual vases in the dollar bin at Target and felt like I struck gold- the perfect size, color… and price.


And now for the answer to the most-asked birthday party question, “where did you get your cupcakes?”

Was it our local celebrity baker from “Cupcake Wars”?  Nope.

I got the perfect garden-themed cupcakes from Sam’s Club Bakery.  I couldn’t have designed them any better myself.  They may have only set me back $40, but these cupcakes could share the battlefield with their $100-opponents anytime; plus I got a mini-cake… bonus!


It’s time for mamma to get those “oh-my-God-you’re-seven-already” photos:


Email this to a Friend Email this to a Friend
Comments { 5 }

Breakfast at Tiffanys Party

A Breakfast at Tiffanys Birthday Party

My oldest daughter may be too old for the typical themed birthday party with cake and ice cream, but she’s never too old for me to make her day special.

It seems like just yesterday when I planned fun and elaborate birthday parties for Rayana, like her 13th birthday when I sent out invitations with just a tater tot glued to the front (sprayed with clear paint) for her Napoleon Dynamite swim party.  A dozen girls swam, snacked on “gosh-darn quesadillas” and tater tots, and delighted at the ice-cream sundae bar.  Then when the sun began to set, they sat on towels in the grass to watch an outdoor showing of the movie while being served buckets filled with popcorn, licorice and glow-in-the-dark bracelets.  Sigh, I miss those days.

Even though Rayana and her friends now “go out” for her birthday, I always hold a special gathering where everyone can stop by and share in a “casual” celebration with food, cake and punch before heading out for whatever college kids do nowadays.  This year I decided on a “Breakfast at Tiffanys” inspired party.

Breakfast At Tiffanys Party

Breakfast At Tiffanys Party Cupcakes


The Tiffany’s necklace is actually Rayana’s.  She received it as a gift from my husband the day the twins were born.  The inscription reads, “You Will Always Be the #1 Girl”, and it still brings a tear to my eye.  It’s been seven years ago since she got that necklace, and a while since she’s worn it.  So, for decoration, I retrieved it from her jewelry drawer and had it shined to put on display, and to remind her that she will always be number one.

There’s no need to go buying expensive party decor.  I used a mannequin from my closet and wrapped it with ribbon, then put a crown on top.  I used beautiful frames that I already had to insert custom-made signs that I printed myself.  And of course- it wouldn’t be a party without my favorite chandelier cupcake stand…. I love that thing (thank you, HomeGoods!)  Come to think of it, the mannequin, frames and cake stand are all from HomeGoods as well.

breakfast at Tiffanys party

Breakfast at Tiffany’s Party

This Tiffany-colored punch is my recipe that is super simple to make.  For more on the recipe visit here:

Breakfast At Tiffanys Party Punch

Breakfast at Tiffanys Party Punch Recipe


Our snack- a Mashed Potato Martini Bar where guests got a martini glass with a scoop of mashed potatoes, then selected their toppings of cheese, bacon, green onions, chicken and/or olives.  I have no doubt Holly Golightly would approve.

Breakfast at Tiffanys Cupcake

Mashed Potato Martini Bar

Chocolate-covered strawberries add elegance to any occasion, but gave my party table a beautiful contrast in color.

Breakfastat Tiffanys Party

Chocolate-covered strawberries bring a nice touch of contrast to the pale Tiffany-blue colors


And here it is, my shining-star photo of the day- The Breakfast at Tiffanys Cupcake.  Beautiful.  The diamond ring?- $2.99 at the party store.

Breakfast at Tiffanys Cupcake

Breakfast at Tiffanys Cupcake


Happy Birthday to my “number one girl”… I’m already thinking ahead to next year!


Email this to a Friend Email this to a Friend
Comments { 7 }

50’s Diner Milkshake Party

50’s Diner Milkshake Party with First Street Ice Cream

Each year we celebrate my grandmother’s birthday with a fun themed party.  When you’re 84 I think every year is cause for celebration.  I’m the one always tasked with coming up with party themes, and this past year I could think of none better than a 50’s diner inspired-party with Diner Milkshakes made with First Street Ice Cream.

milkshake recipe

Planning The Party

Before heading off to Smart & Final, a great place to shop for party food, I made a list of what I need to make our yummy milkshakes:

Shopping List

  1. First Street Ice Cream in Chocolate and Strawberry
  2. First Street Whipped Cream
  3. First Street Maraschino Cherries
  4. milk
  5. plastic cups
  6. milkshake straws
milkshake party

Diner Milkshake party


Shopping For The Party

After planning was complete, it was time to shop.  At Smart & Final, I expectedly found everything I needed for my party and more.  I came across some gumballs and thought they would fit in perfectly with our theme.

I found everything at Smart & Final that I needed for our party and more

Making 50’s Diner Milkshakes

We made both strawberry and chocolate milkshakes for our party and they were a huge hit with our guests.

milkshake recipe

50's Diner Milkshakes

Homemade Milkshake Recipe

Ingredients:

  1. 4 cups First Street Ice Cream in Chocolate and Strawberry
  2. 2 cups milk
  3. First Street Whipped Cream
  4. First Street Maraschino Cherries
  5. 1 tspn vanilla extract

Directions:

  1. Place ice cream, milk and vanilla in blender
  2. Blend until smooth, just 5 seconds
  3. Pour into cups and top with whipped cream and a cherry

For a printer-friendly recipe version click here:  Homemade Milkshake Recipe

First Street Strawberry Ice Cream


blend milkshake ingredients until smooth


Strawberry 50's Diner Milkshakes with First Street Ice Cream


And, if you’re lucky enough to have someone you can bribe into putting on some roller skates and a retro apron to serve milkshakes, it’s a fun touch.  I’m fortunate to have my oldest daughter Rayana, who I can always count on to help me with family events.

time to serve!


50's Diner Party

50's Diner Milkshake Party


For more recipe ideas with First Street Ice Cream from Smart & Final visit them on Twitter and Facebook!


I am a member of the Collective Bias™ Social Fabric® Community. This shop has been compensated as part of a social shopper insights study for Collective Bias™. All opinions expressed herein are very much my own.

#CBias #SocialFabric


The Organized Cook™ Weekly Meal Plan

Never worry again about what you’re going to make for dinner. Cut your grocery shopping and dinner preparation time by up to 70%. Weekly Meal Plans
Learn MoreSign up!

Buy The Book

Cookbook

Get your copy now!


$16.99
Order Now.

Three months of our most popular menus from The Organized Cook™ Weekly Meal Plan System including grocery shopping lists, cooking instructions and lots of time and money saving tips in one book that's easy to fit in your purse.

Start saving now! Save time and money at the grocery store and in the kitchen. Order Now.

Gourmet Ads

Follow Me on Pinterest

Toni Recommends

Follow Me on Instagram